I’ve made no attempt to hide how much I absolutely adore anything digital while at work and on the blog. I’m officially the ‘digital innovator’ for Humanities and Social Sciences at my school, which means that I get to test out lots of features on our work iPads and report back as to which are the most effective.
It’s a great way to improve our workloads and make our lives just that little bit easier. I’ve come up with 6 hacks that we can use in the planning, preparation, and delivery of our lessons, as well hacks that the students can use, too. I’d recommend using an iPad Air 6 for delivering your digital content, which I’ve reviewed here, to get the most out of your digital classroom.
Here’s a collection of all of the digital innovations I’ve come up with so far.
Reduce your workload with AI
AI can be really dangerous. It can reduce all need for human creativity and there’s a great debate over whether it should be used to replace human-led jobs. Certainly, there is a lot to be said over how ethical AI is. However, when used wisely, it can be a great asset in the classroom.
I’ve used AI to massively reduce my workload by helping me to produce model answers. With the latest and greatest in ChatGPT 4, I’ve managed to upload mark schemes that help it to learn how best to respond. While you should always proof-read AI’s responses, it’s undoubtedly a great tool since it provides a starting point, no matter how basic, that you can combine with your teaching expertise to produce a really great set of classroom resources.
For more on how I use AI in the classroom, click here.
Check everyone’s learning with Whiteboard.FI
I’ve been using Whiteboard.FI for years now. This is a website where teachers can view all of their students’ virtual whiteboards at the same time, meaning that you’ll need a classroom full of tablet-users for this one to be of any use to you.

Teachers can write onto their personal whiteboards and ‘push’ this onto their students. For one example, a teacher might write ‘What is 2+2?’ This question is pushed to their student whiteboards, and you can watch from your screen as all of your students attempt to input the correct answer.
I’ve found this particularly useful for digital source annotation, saving me time on printing in the morning before I need to get to my form group. The fact that you can see all students writing at the same time is invaluable, since you’ll know who needs help at a glance, rather than having to race around your classroom. Even better is that students can’t edit the answers of others, which I found to be a huge problem with the likes of Google Jamboard.
You could then screenshot everyone’s work and upload it to your virtual learning platform to create a permanent record for students or parents to look back on.
Text-to-speech
Something that I noticed while researching my Masters in Teaching Studies with the University of Birmingham, which focused on digital exercise books, is that students sometimes lack the confidence to commit pen to paper, since it can feel too permanent.
So, why not remove the middle man? During the planning stages of extended writing, ask students to use the microphone icon on their tablets and speak their answers. This is really useful since it can make their ‘writing’ feel non-committal, helping them to plan their answers before editing and writing up formally at a later date.
What I’ve done in the past is pose the following question: Why did William win the Battle of Hastings? I’ve created a model answer with the students to write one paragraph together, but then it’ll be their turn to write paragraph 2. Instead of leaving them to write, they’ll talk through their answers with one another first. This gives students ample thinking time in a low-stakes environment.
Then, I’ll leave some sentence starters on the board to help them form a PEE paragraph, e.g. ‘One reason that William won was…For example…This led to him winning because…’ Students then need to fill in the blanks using their voice, which they would have already practised with their partner.
Once they can see a paragraph that they have created written in front of them, they might feel more comfortable with having a go at writing a third paragraph independently.
Snipping like a pro
I cannot tell you the amount of times I’ve used low-quality images in my presentation and documents without meaning to. The number one cause of this is from simply tapping the ‘print screen’ button on my keyboard. I couldn’t tell you why but, for some reason, the quality of the image will always deteriorate between pasting it in, saving the file, and reopening it some other day.
Let’s put a stop to that. Come on, students deserve high-quality images on your whiteboard.
All you need to do is hold the following buttons at the same time on a Windows laptop or PC:
START, SHIFT, S
Doing so opens the ‘snipping tool’. From here, you can draw around whatever image you want to keep. This image gets added to your clipboard, so simply paste the image into whatever file it needs to go into.

Better visualisation
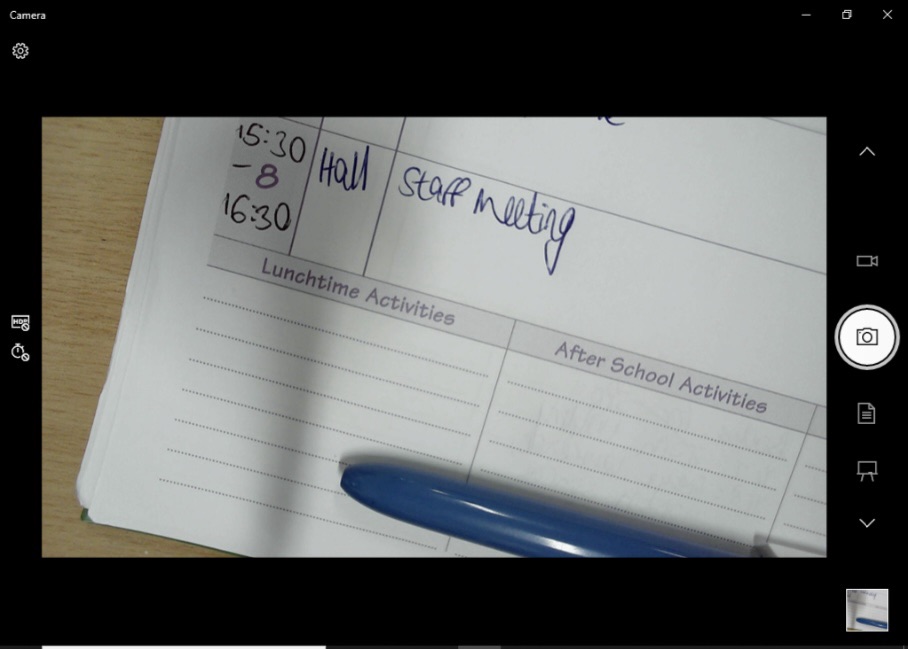
I love using my visualiser. It allows you to project whatever is on your desk onto the big screen, so you can breakdown a written response or a source together with the students really easily.
At my school, we used the Hue app to do this, as it came with the visualisers.
However, it looks like – and I do not use this term lightly – a potato. Instead, regardless of the software on your PC, all you need to do is search for the ‘camera’ app. Open that and enjoy the better quality image that takes up far more of the screen.

Google image quality
We’re really getting into the weeds with this one, aren’t we? Picture this: you’re sat in a classroom for up to six hours per day, and the images that your teacher is using are pixelated, have weird backgrounds, and kind of strain your eyes.
That is the reality of many students whose teachers are using the wrong kind of images for the big screen.
Why is this an issue? Think of it like going to the cinema. The image that you see on your 720p 24 inch TV at home might look fine but, blow that up onto a cinema screen, and suddenly all you’ll see is a blur, rather than the action sequence.
All we need to do is increase the resolution on the images that we’re using. To do this, search for large images only. On Google, click:
TOOLS, SIZE, LARGE.
Equally, if you’re using icons, such as smiley faces or cartoons, you should search for images with transparent backgrounds. Do this by applying the following filter:
TOOLS, COLOUR, TRANSPARENT.
See? A simple fix to drastically improve the viewing experience. Your students will thank you later.
What digital hacks do you use in your classroom? I’d love to level up my knowledge in the comments below.
While you’re here, why not read…
- Reclaim your evenings: A Busy Teacher’s Guide to Healthy Meal prep
- 16 incredible books to read in 2026
- How to actually achieve your goals in 2026: The Anti-Resolution toolkit
- The First 90 Days: How to survive (and thrive) as a new Head of History
- 7 Brutal Questions to Course-Correct your Life before 2026
Follow my socials!

Digital strategies are essential in today’s classrooms! These tips are practical and enhance the learning experience for students and teachers alike. Great insights!
LikeLiked by 1 person
Glad you liked it, Jack! I take a very digital-first approach since that’s what a lot of them will be dealing with in the world of work. Do you have any useful strategies?
LikeLike