Google Slides is a fantastic tool for creating presentations on the go, but using it on an iPad comes with its own set of challenges. Whether you’re designing slides for a meeting, a class project, or a pitch deck, getting the most out of Google Slides on iPad requires knowing when to use the app and when to use the browser version. In this guide, I’ll walk you through the best ways to use Google Slides on iPad, along with pro tips to make your workflow as smooth as possible.
(If you’re also using Google Docs on iPad, check out my guide on using it like a pro. Or hit this link for using Google Drive like a pro, as well as why Drive trumps Microsoft 365).
Google Slides App vs. Browser Version: Which One Should You Use?
Just like with Google Docs, there are two main ways to use Google Slides on an iPad: the dedicated app and the browser version (via Safari or Chrome). Each has its own set of strengths and limitations, depending on what kind of work you’re doing.

If you need to make quick edits, work offline, or prefer a touch-friendly experience, the app will likely serve you best. But if you’re creating a complex deck, require advanced formatting tools, or need desktop-like functionality, the browser version will give you more control.
Optimising Your Google Slides Setup on iPad
Before diving into slide creation, it’s worth spending a few minutes setting yourself up for success.
Start by ensuring the Google Slides app is fully updated. Each new update often brings performance improvements, bug fixes, and sometimes new features. If you plan to write a lot of text or rearrange content frequently, an external keyboard—I’d recommend the Logitech Combo Touch—will make a significant difference in speed and comfort (you might even get your typing speed close to mine. Find out how I practiced to type at 110 words per minute here). Spend a few minutes familiarising yourself with the formatting toolbar, so you can quickly access the features you use most often. If you tend to work in the evenings, enabling Dark Mode can help reduce eye strain. Or you could rely on some red-lens glasses to keep away the nasty blue light from your eyes.
Mastering Navigation and Touch Gestures
Even though iPad doesn’t always offer the same granular control as desktop operating systems, you can still navigate your presentations efficiently with a few touch and gesture techniques.
Dragging and dropping slides within the slide sorter view is intuitive and responsive. Pinch-to-zoom lets you zoom in on small elements or out for an overview of your slide layout. If you use an external Keyboard or connect a trackpad or mouse, you’ll gain more precise control, closer to what you’d expect on a laptop or desktop.
Boosting Productivity with Keyboard Shortcuts
If you’re working with an external keyboard, you can take advantage of keyboard shortcuts to speed up your workflow:
- Basic commands like copy (Cmd + C), paste (Cmd + V), and cut (Cmd + X) should already be familiar
- Undo and redo can be performed with Cmd + Z and Shift + Cmd + Z, respectively.
- You can insert links with Cmd + Shift + K and add a new slide using Cmd + Shift + M.
- Navigating between slides is quick with the arrow keys.
While these shortcuts are generally supported in both the app and the browser, certain advanced ones—like object alignment and grouping—are only accessible in the browser. For more advanced keyboard shortcuts, check out my full list here.
Integrating Google Slides with Other iPad Apps
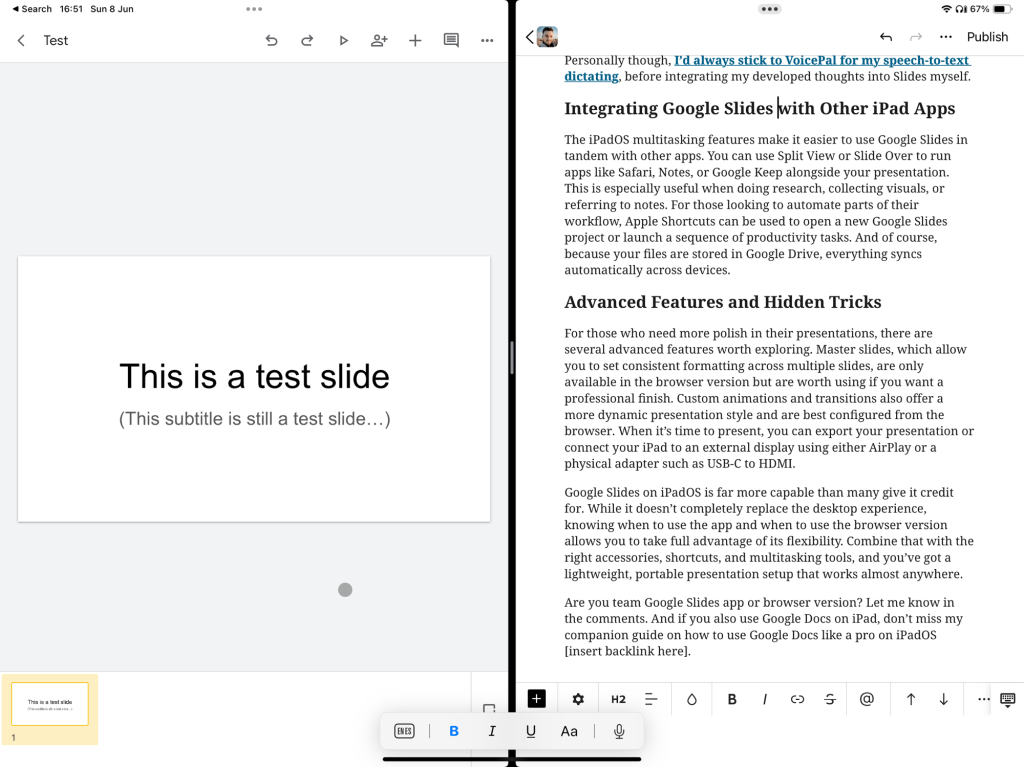
The iPadOS multitasking features make it easier to use Google Slides in tandem with other apps. You can use Split View or Slide Over to run apps like Safari, Notes, or Google Keep alongside your presentation. This is especially useful when doing research, collecting visuals, or referring to notes. For those looking to automate parts of their workflow, Apple Shortcuts can be used to open a new Google Slides project or launch a sequence of productivity tasks. And of course, because your files are stored in Google Drive, everything syncs automatically across devices.
Sadly, only the browser version lets you open multiple instances of Slides side-by-side so, if that’s a necessity, stay away from the app.
Enhancing Collaboration and Offline Work
Google Slides excels in collaboration, and that functionality is largely preserved on iPad. You can leave comments, tag colleagues, and view live edits with minimal lag, especially in the browser version. Offline editing is supported in the app and can be enabled through settings in Google Drive, which is useful if you’re working during a commute or in places without internet access. If you prefer dictating your notes rather than typing them, the built-in voice dictation feature on iPad can be a useful way to capture thoughts quickly.
Personally though, I’d always stick to VoicePal for my speech-to-text dictating, before integrating my developed thoughts into Slides myself.
Advanced Features and Hidden Tricks
For those who need more polish in their presentations, there are several advanced features worth exploring. Master slides, which allow you to set consistent formatting across multiple slides, are only available in the browser version but are worth using if you want a professional finish. I’ve certainly seen them used more than once by colleagues in teaching.
Custom animations and transitions also offer a more dynamic presentation style and are best configured from the browser. When it’s time to present, you can export your presentation or connect your iPad to an external display using either AirPlay or a physical adapter such as USB-C to HDMI.
Google Slides on iPad is far more capable than many give it credit for. While it doesn’t completely replace the desktop experience, knowing when to use the app and when to use the browser version allows you to take full advantage of its flexibility. Combine that with the right accessories, shortcuts, and multitasking tools, and you’ve got a lightweight, portable presentation setup that works almost anywhere.
Are you team Google Slides app or browser version? Let me know in the comments. And if you also use Google Docs on iPad, don’t miss my companion guide on how to use Google Docs like a pro on iPad, as well as their bigger brother: using Drive like a pro on iPad.
