If you’ve ever tried working on Google Docs using an iPad, you know that it works really well – until it doesn’t. Having your documents accessible from anywhere, through any device, is amazing, but we’ve got to be honest with ourselves: the experience isn’t always seamless. The app feels distinctly different from the desktop experience, and figuring out the best way to work efficiently can be tricky.
Regardless of how you end up working, you’ll need a place to open your files, so start with reading my reviews of the iPad Air 6 and iPad 10. Then, before you start with Docs, get onto my comparison of Drive and Office 365 to ensure that the Google Suite of apps is the right choice for you. Once you’ve settled on the G-Suite, learn first how to use Google Drive like a pro.
By the end of this guide, you’ll have a really solid understanding of how to use Google Docs like a pro on iPad, whether you’ve opted for desktop or browser.

Google Docs App vs. Browser: Which One Should You Use?
Before diving into the nitty-gritty, let’s talk about an important decision: should you use the Google Docs app or the browser version on Safari or Chrome? Both have their strengths, and knowing when to use each can significantly improve your workflow.
The Google Docs app is optimised for touch, making navigation smoother on the iPad’s screen. It allows offline editing, which the browser version doesn’t, and supports the Scribble feature with Apple Pencil, letting you handwrite text that’s converted into typed content. Personally, I don’t tend to use this feature; if I want to handwrite something, I’ll do it over on OneNote or the Notes app. It also integrates nicely with iPadOS features like drag-and-drop, Split View, and Slide Over, as well as Stage Manager if you’re using one of the more powerful iPad models.
On the other hand, the browser version—whether Safari or Chrome—offers more features. You get access to desktop-specific tools like advanced formatting, pageless view, and better version history. I can’t tell you how useful this feature has been when editing collaboratively. As a result, working with others feels smoother in the browser, and with a trackpad or keyboard, the interface feels much closer to the desktop experience. I’d always recommend the Logitech Combo Touch Keyboard Case over the Apple Magic Keyboard, since it offers greater protection and versatility.
So, which one should you use? If you’re working on a quick document, need offline access, or prefer using touch, stick with the Google Docs app. But if you need advanced features, better formatting, or a more desktop-like environment, use the browser version. I personally switch between both depending on what I’m doing and what I need.
Optimising Your Google Docs Setup on iPad
Now that you’ve picked your weapon of choice, let’s optimise your setup. First, keep the app updated—new updates often fix bugs and improve performance. Next, use an external keyboard. Typing with an on-screen keyboard slows you down, while a bluetooth keyboard makes editing much faster. Also, take the time to customize Google Docs settings—whether in the app or browser. You can tweak preferences like default fonts, autocorrect, and dark mode to better suit your workflow. If you’re a student, you’ll find this one particularly useful. My assignments always required 1.5-line-spacing, Times New Roman and size 12 font, so making these your defaults will save you buckets of time each day.
Mastering Navigation and Touch Gestures
The quickest way that you’re going to see results in improved performance is by increasing your typing speed – click here to read about how I got mine up to 110 words per minute.
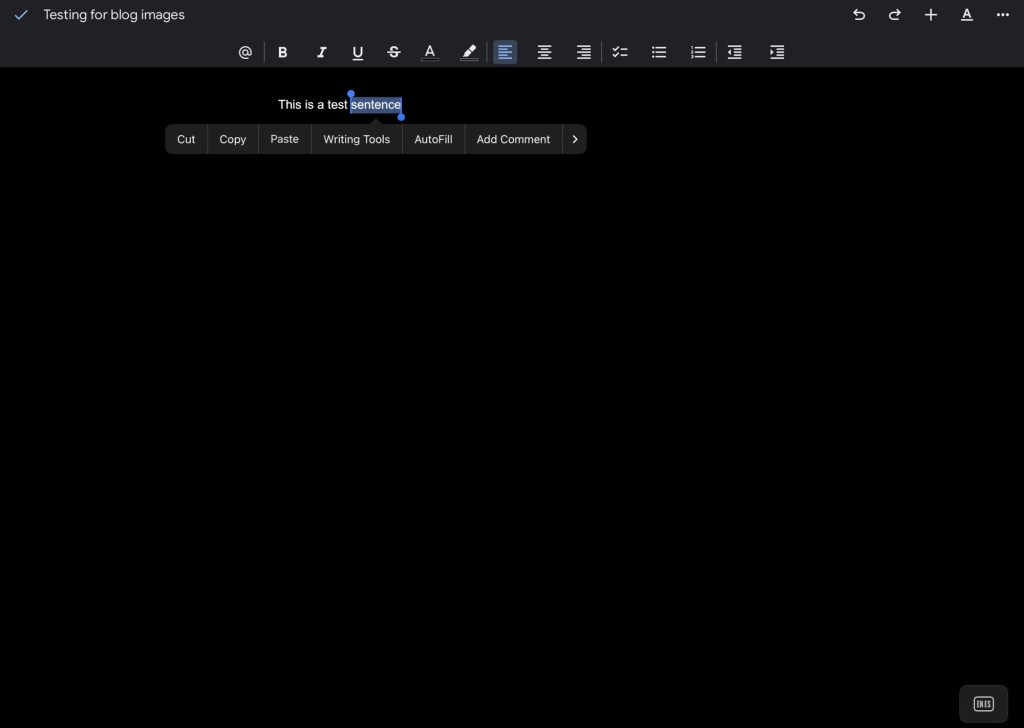
However, efficiency in Google Docs isn’t just about typing fast—it’s also about smart navigation. In the app, the floating toolbar gives you quick access to formatting tools without digging through menus. For text selection, tap and hold to bring up the selection menu. If you’re using a trackpad, two fingers allow you to highlight text quickly. Cursor control is also much easier with a trackpad or mouse, making the experience more precise and less frustrating.
When I want true precision, I connect my Logitech MX Master 2, an ergonomic mouse that feels great in my big hands. That’s usually reserved only for when my iPad has been connected to an external monitor, though.
Boosting Productivity with Keyboard Shortcuts
If you’re using a keyboard, learning a few shortcuts can really boost your productivity. Here are some key ones to know:
- Cmd + B for bold
- Cmd + I for italic
- Cmd + U for underline
- Cmd + C, V, or X for copy, paste, and cut
- Cmd + Z and Shift + Cmd + Z for undo and redo
- Cmd + Shift + K to insert a link
These shortcuts work in both the app and the browser, though some (like indenting with the Tab key) perform more reliably in the web version. For a more robust list of shortcuts, read this.
Enhancing Collaboration and Offline Work
Google Docs is built for collaboration, and the iPad version holds up pretty well here. You can tag team members using @mentions and leave comments for feedback in real time. While the app doesn’t have the same full-featured voice typing as the desktop, you can still use the iPad’s built-in dictation by tapping the microphone on the keyboard to quickly jot down notes. This part is great if you’re using iPads to teach, as some students can struggle to get started with writing and might benefit from speaking an answer first.
For offline work, enable the “Available Offline” option in the app so you can keep working even when Wi-Fi isn’t available.
Integrating Google Docs with Other iPad Apps
To work smarter, take advantage of how Google Docs integrates with other iPad features. Use Split View and Slide Over to keep Google Docs side-by-side with Notes or Chrome while you research. With the Shortcuts app, you can even automate tasks like starting a new document with a tap. And since everything syncs automatically with Google Drive, you don’t have to worry about losing your work.
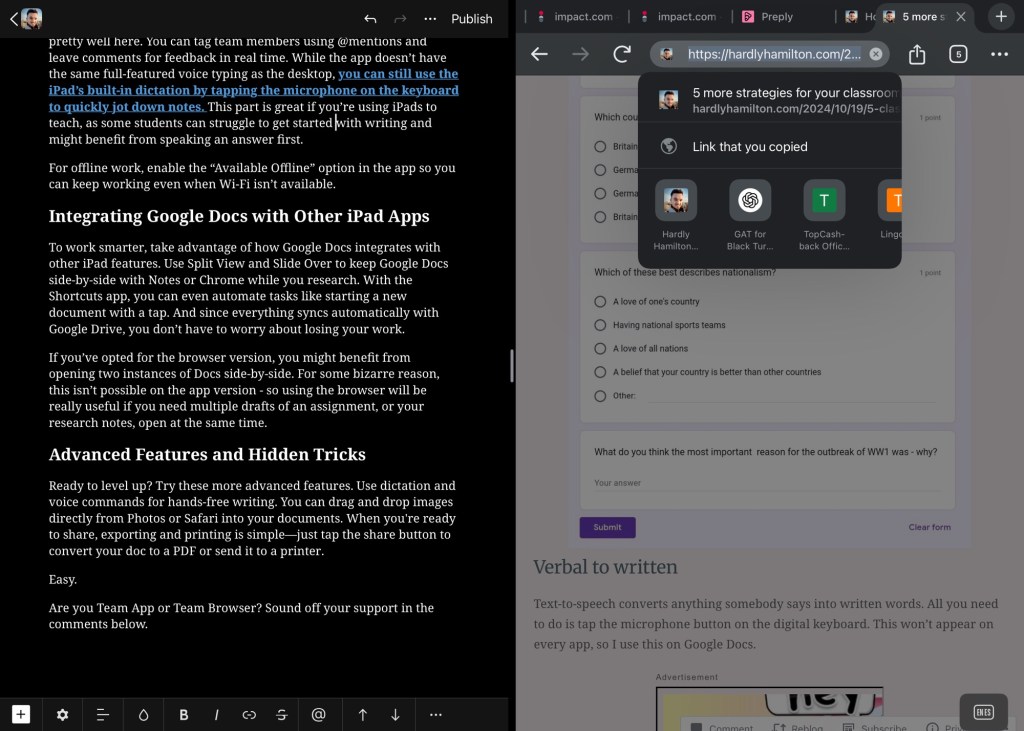
If you’ve opted for the browser version, you might benefit from opening two instances of Docs side-by-side. For some bizarre reason, this isn’t possible on the app version – so using the browser will be really useful if you need multiple drafts of an assignment, or your research notes, open at the same time.
Advanced Features and Hidden Tricks
Ready to level up? Try these more advanced features. Use dictation and voice commands for hands-free writing. You can drag and drop images directly from Photos or Safari into your documents. When you’re ready to share, exporting and printing is simple—just tap the share button to convert your doc to a PDF or send it to a printer.
Easy.
Are you Team App or Team Browser? Sound off your support in the comments below.
While you’re here, why not read…
- Reclaim your evenings: A Busy Teacher’s Guide to Healthy Meal prep
- 16 incredible books to read in 2026
- How to actually achieve your goals in 2026: The Anti-Resolution toolkit
- The First 90 Days: How to survive (and thrive) as a new Head of History
- 7 Brutal Questions to Course-Correct your Life before 2026
Follow my socials!
